
Queen rearing can be a hugely rewarding aspect of beekeeping when successful and the most exasperating when it does not go to plan. I recommend you embark on it willing to learn incrementally from your experience and not be deterred by disappointments. Success generally follows careful application and practice of sound guidance.
There are five basic stages to plan and manage, from the laying of eggs to successfully mated queens laying eggs in their own colonies. I will explain each of these, briefly, highlighting key aspects. These stages involve the raising of queen cells from fertilised worker eggs rather than using swarm, supersedure or emergency cells already drawn by bees.
1. Planning and creating a timeline
Preparatory reading around the subject is important. The beekeeper needs a sound understanding of what is intended at each stage and how the bees are likely to respond to the interventions. Queen Rearing, a recently-published BBKA guide, is an excellent place to start. Another easy read is Ben Harden’s Some Alternative Pathways for the Hesitant Queen Rearer available from the usual sources.
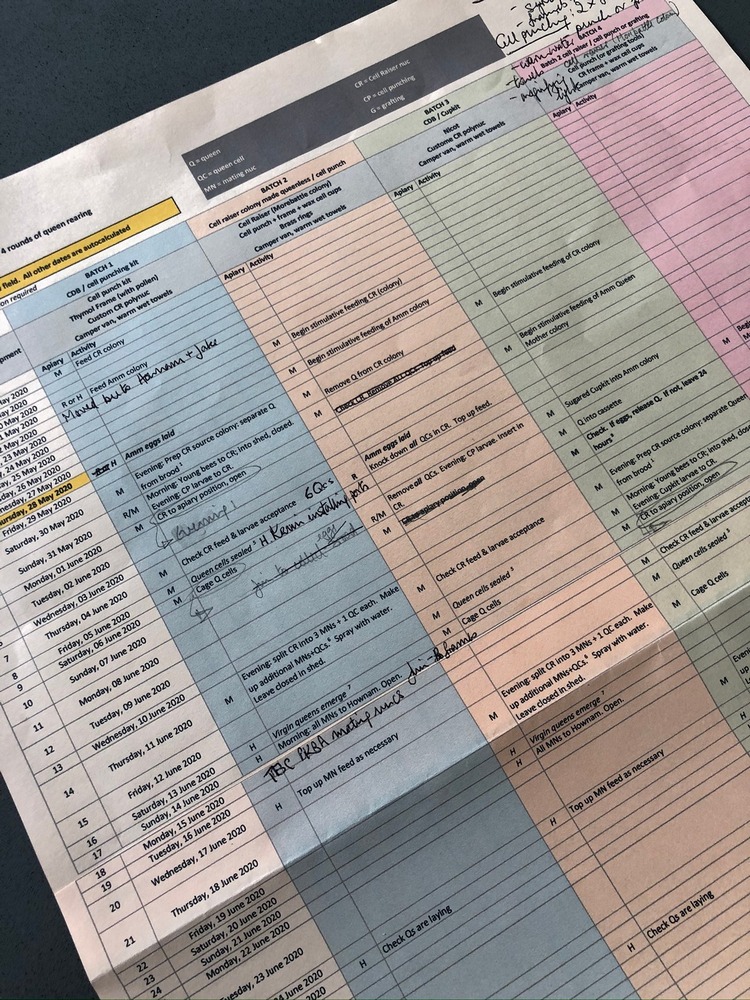
Having chosen the methods you wish to use to raise queens, a precise timeline is essential. The timing of queen brood development will become very familiar and this dictates the early stages of your timeline. The Cheviot Project is currently following the timeline illustrated to raise batches of native bee queens through May to July.
2. Selecting and presenting larvae of suitable age
Queens develop from fertilised eggs, as do worker bees. The difference lies in how the larvae is fed. Queens are raised in much larger, downward-hanging cells and are fed a richer brood food in greater quantities than workers.
Your raising of queens will begin with selecting larvae of the ideal size from a brood frame, to be fed generously as a potential queen for the longest possible time – ie larvae within 12-24 hours of hatching from eggs. The photo shows a suitable larva chosen for cell punching: Numbered 1, it is very small and gently curved but not yet forming a ‘C’.
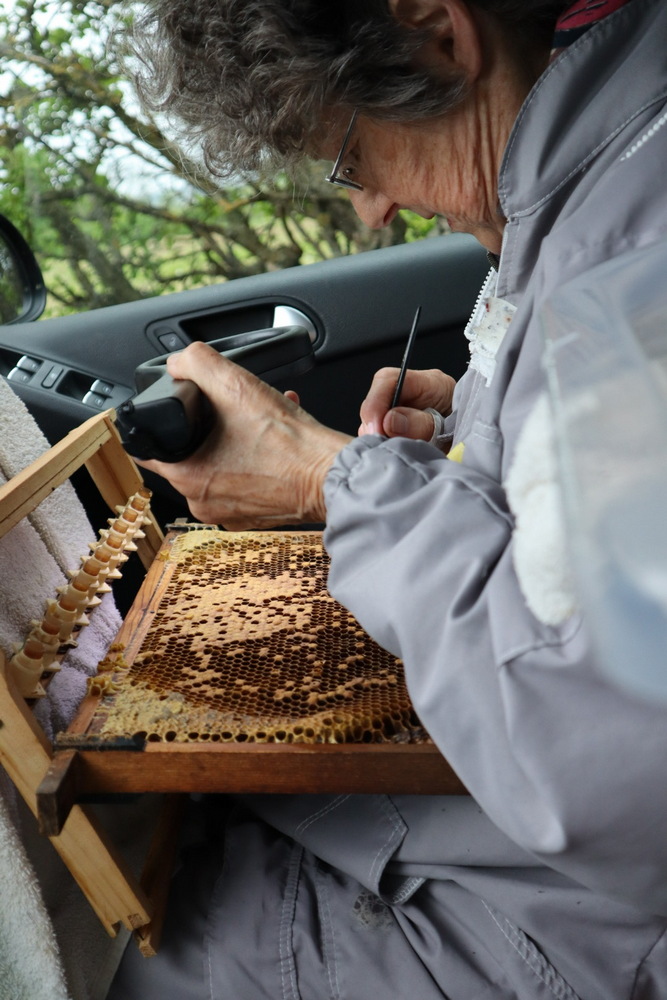
Grafting (moving larvae with a brush or special instrument), cell punching (a method we are trialling this year) or using a Nicot or Cupkit system: these are some of the ways to charge the queen cell cups, arranged on a frame, with suitable larvae.
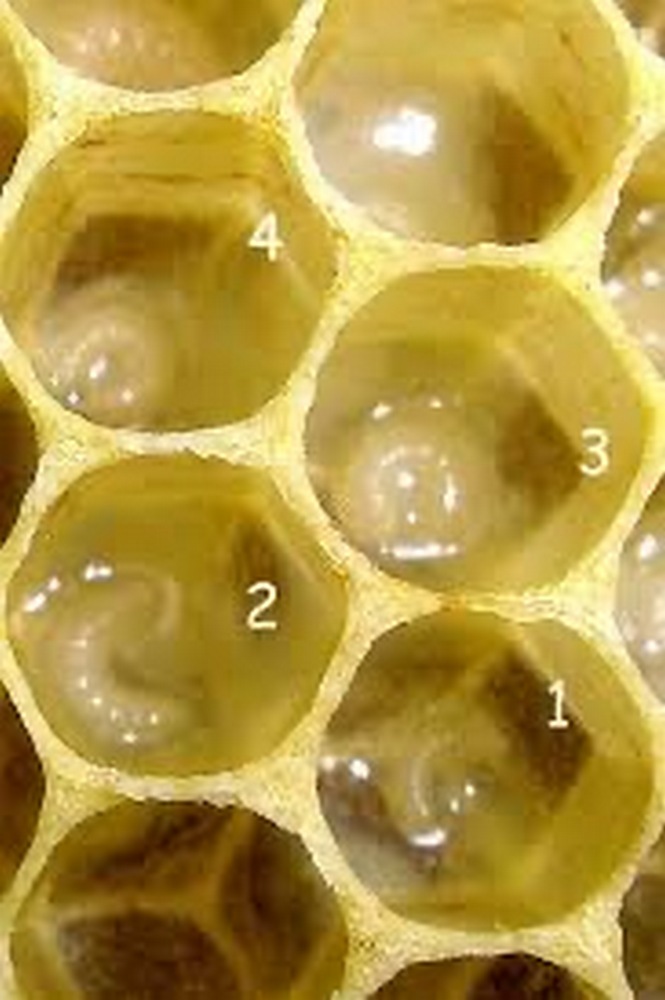
Left: Larvae of different ages: 1 is the size we seek for queen cell raising (Pic Beemaster.com)
Right: Grafting larvae from brood frame with very fine paint brush and placing in cell cups on frame
3. Preparing a colony for cell raising and finishing
The frame of larvae needs quickly to be placed in a colony ripe for drawing out the cells with wax and feeding the larvae large quantities of queen substance. Many young bees of 5-11 days old are needed, along with apparent queenlessness in the colony to prompt the queen-raising response. They must be exceedingly well fed and have plenty of pollen and nectar/honey near the cells to be drawn.
This stage involves ‘cell raising’ (the larvae being accepted as queen material) and ‘cell finishing’ (completion of feeding and cell building). Together this takes nearly 5 days, at which point the queen cells are sealed (day 8-9 after the eggs are laid). The Cheviot Project often chooses to use a queenless cell raising/finishing colony for to produce queen cells though large queen rearers will often separate the two functions between queenless and queenright colonies, adopting a methods which involves manipulations to render a queenright colony temporarily queenless for the early stage only.
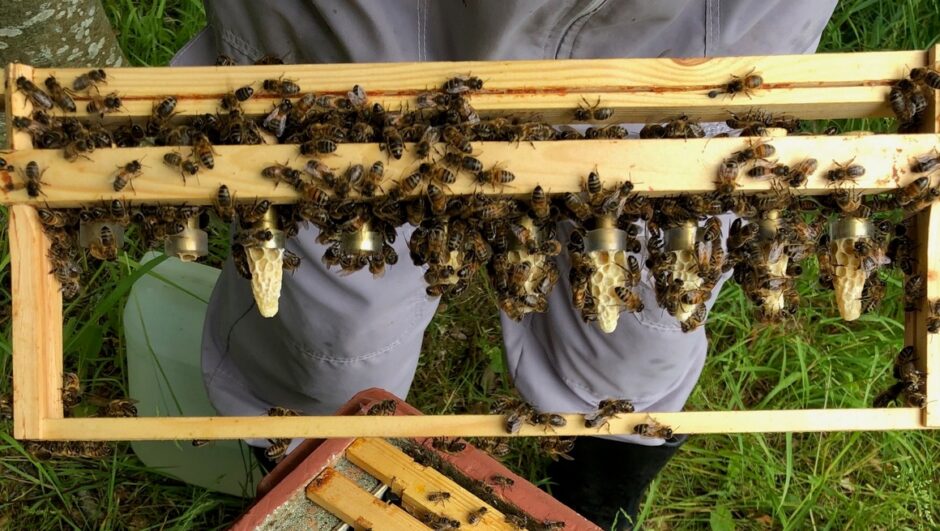
See header photo: six good queen cells from ten using a cell-punching kit. Not a great result, but it was our first attempt with this method!
4. Managing mating nucs for the queen cells
Before considering the mating nucs, remember there will need to be sufficient healthy drones in the vicinity to achieve successful mating. Your queen rearing will need to be timed to allow for this and drone mother colonies may need extra feeding and support.
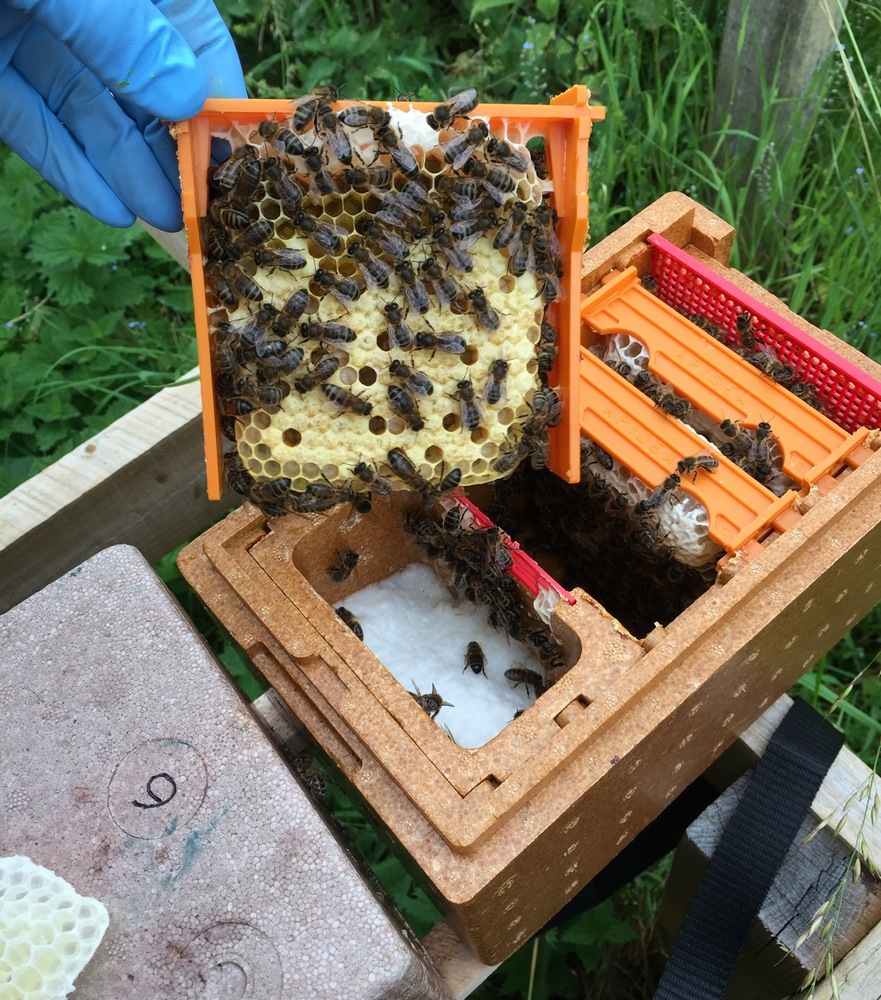
A virgin queen will emerge from the cell in which she has developed about 8 days after it is sealed. A couple of days before she emerges, the beekeeper will prepare a mating nuc for her, filled with enough fairly young bees to care for her and draw wax if necessary. Again there are several options: you may use Apideas – well designed small mating nucs – or the slightly larger Lyson MiniPlus nucs which can be run as one or two units. These mating nucs have small frames of unique sizes.
The Cheviot Project is building up stock so we also like to use 2-in-1 polystyrene nucs with full-sized national frames, three in each side. Queens mated in these are ready to receive more frames and be built up as full colonies, without having to be removed from a mating-nuc and introduced to a colony (see below).
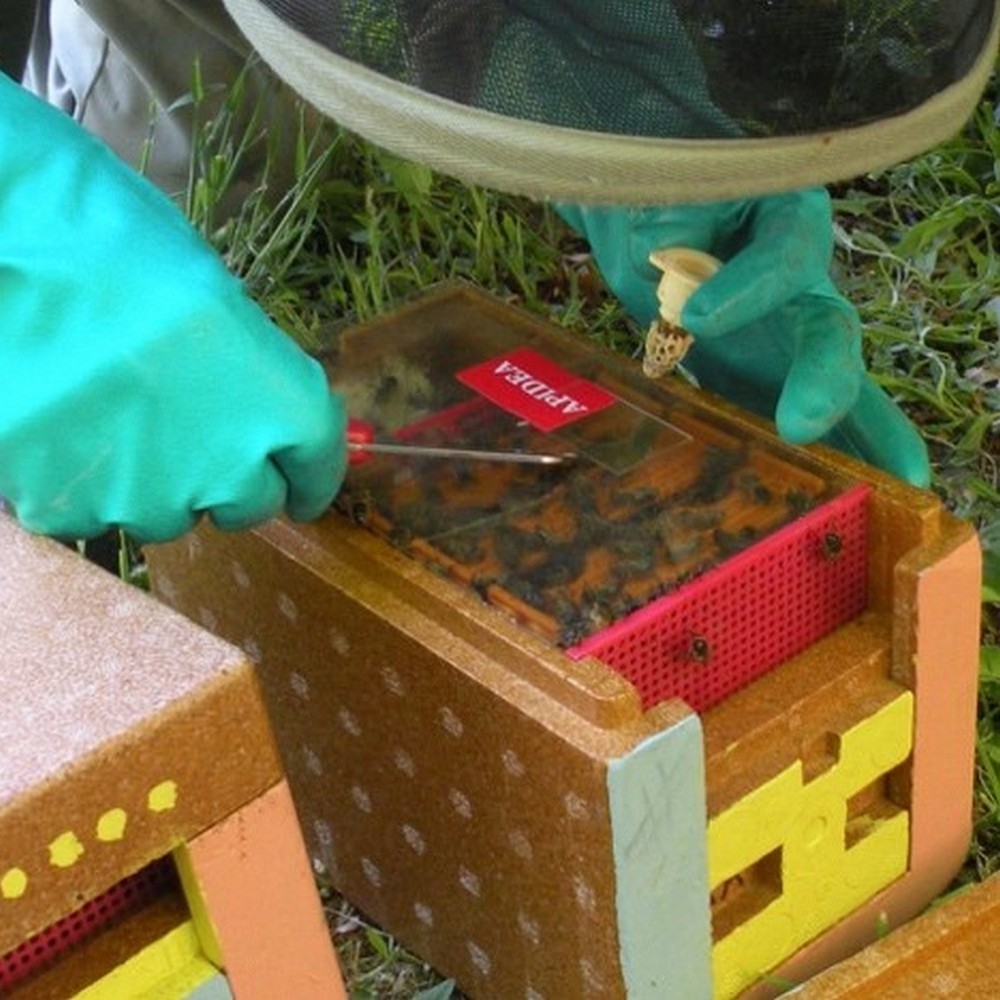
Left: Inserting a queen cell into an Apidea filled with bees
Right: Checking an Apidea: the queen is laying successfully!
Managing the smaller mating nucs is an art in itself and deserves special attention. For our project, we fill them with bees taken from the supers of local colonies. This ensures that unwanted drones are not included and the age of the workers is suitable for the tasks we commit them to – ie wax building and tending a newly laying queen and her brood.
Generally I leave mating nucs for 2-3 weeks before checking to see if the queen is successfully mated and laying. It is not until some of her brood is sealed that you can tell if she is laying fertilised eggs in a good pattern. The smaller the mating nuc, the faster the mating can be, so a queen in an Apidea might have sealed brood after two weeks while her neighbour in a polynuc might take another week or so. But mating, which involves several flights by the virgin queen, is uncertain and hazardous in our quixotic climate. So many virgin queens will fail to mate or disappear.
5. Introducing mating queens to colonies
The final hurdle is to establish your successfully mated and laying queen in a colony on full-sized frames. As mentioned already, this is easy when she began her mature life on full frames when the colony can simply be built up or united with another queenless unit.
More difficult is introducing a queen from a small mating nuc. This involves placing her and a few accompanying bees in a queen cage and introducing this to queenless bees (be certain they are!). A colony is generally highly reluctant to accept an incoming queen if they have the means to create a queen of their own kind. So, before you introduce a queen, you are best to render the colony queenless at least 8 days in advance of the introduction, so you can knock down any queen cells they make and ensure they have no eggs/larvae left from which to make more. The queen cage can be opened so the bees can eat their way free through fondant only once the colony is peaceful and seems keen to accept their new queen. This may be several days after the queen cage is introduced.
Kate Atchely
Photos mostly by Justine Swinney